
前回においてGoogle Cloudを通じてGoogle Analyticsへのアクセス認証のお膳立てができたとろで、今回は目的のデータ取得のコマンドの開発です。
認証に必要なデータを設定する
新規のLaravelのプロジェクトを作成した後に、まず前回で用意したアクセス認証のための、プロパティIDと秘密鍵を含むga4.keyファイルの取り込みの設定をします。
プロパティID
GA4のプロパティIDは、config('services.ga4.property_id')として取り込むので、以下のコードを追加します。
return [

    /*
    |--------------------------------------------------------------------------
    | Third Party Services
    |--------------------------------------------------------------------------
    |
    | This file is for storing the credentials for third party services such
    | as Mailgun, Postmark, AWS and more. This file provides the de facto
    | location for this type of information, allowing packages to have
    | a conventional file to locate the various service credentials.
    |
    */
...

    'ga4' => [
        'property_id' => env('GA4_PROPERTY_ID'),
    ],

];
もちろん、.envでは、以下のようにプロパティIDを指定します。
...
GA4_PROPERTY_ID=2XXXXXX2
ga4.key
サービスアカウントで作成した秘密鍵を含むjsonファイルga4.keyは、storage/ga4.keyに移します。
そこの場所にファイルを置く理由は、GITバージョン管理から外すためです。Laravelのデフォルトの.gitignoreの設定には、/storage/*.keyがあります。
/node_modules
/public/build
/public/hot
/public/storage
/storage/*.key
/vendor
.env
.env.backup
.env.production
.phpunit.result.cache
...
Laravelのコマンドを作成
いよいよコマンドの開発です。まず、必要なライブラリを以下の実行で追加します。
$ composer require google/analytics-data
そして、GA4のデータの取得のためのコマンドを作成します。
namespace App\Console\Commands;
use Illuminate\Support\Str;
use Illuminate\Console\Command;
use Google\Analytics\Data\V1beta\BetaAnalyticsDataClient;
use Google\Analytics\Data\V1beta\DateRange;
use Google\Analytics\Data\V1beta\Dimension;
use Google\Analytics\Data\V1beta\OrderBy;
use Google\Analytics\Data\V1beta\OrderBy\MetricOrderBy;
use Google\Analytics\Data\V1beta\Metric;
class Ga4Command extends Command
{
/**
* The name and signature of the console command.
*
* @var string
*/
protected $signature = 'ga4';
/**
* The console command description.
*
* @var string
*/
protected $description = 'Get GA4 data';
/**
* Execute the console command.
*
* @return int
*/
public function handle()
{
$client = new BetaAnalyticsDataClient([
'credentials' => storage_path('ga4.key'), // GA4のデータのアクセスに必要なファイルへのパス
]);
$response = $client->runReport([
'property' => 'properties/'.config('services.ga4.property_id'), // このプロパティIDのプロパティにアクセス
'dateRanges' => [
new DateRange([ // 今日から過去28日間のデータに絞る
'start_date' => '28daysAgo',
'end_date' => 'today',
]),
],
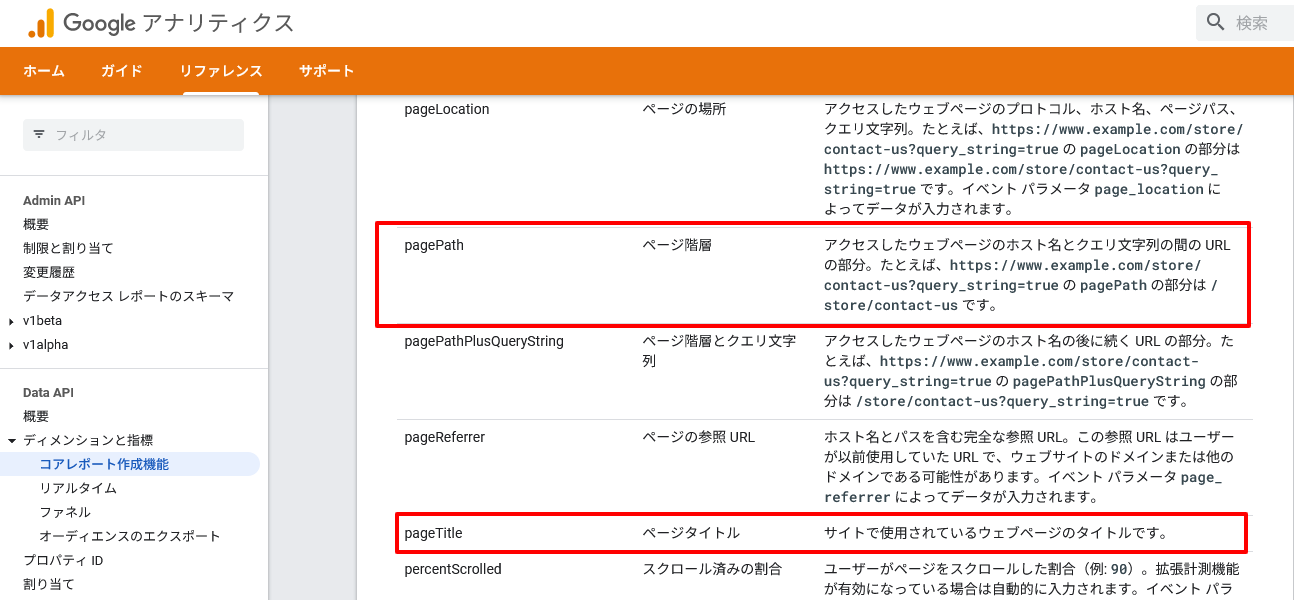
'dimensions' => [ // ページタイトルとページパスがディメンション
new Dimension(['name' => 'pageTitle']),
new Dimension(['name' => 'pagePath']),
],
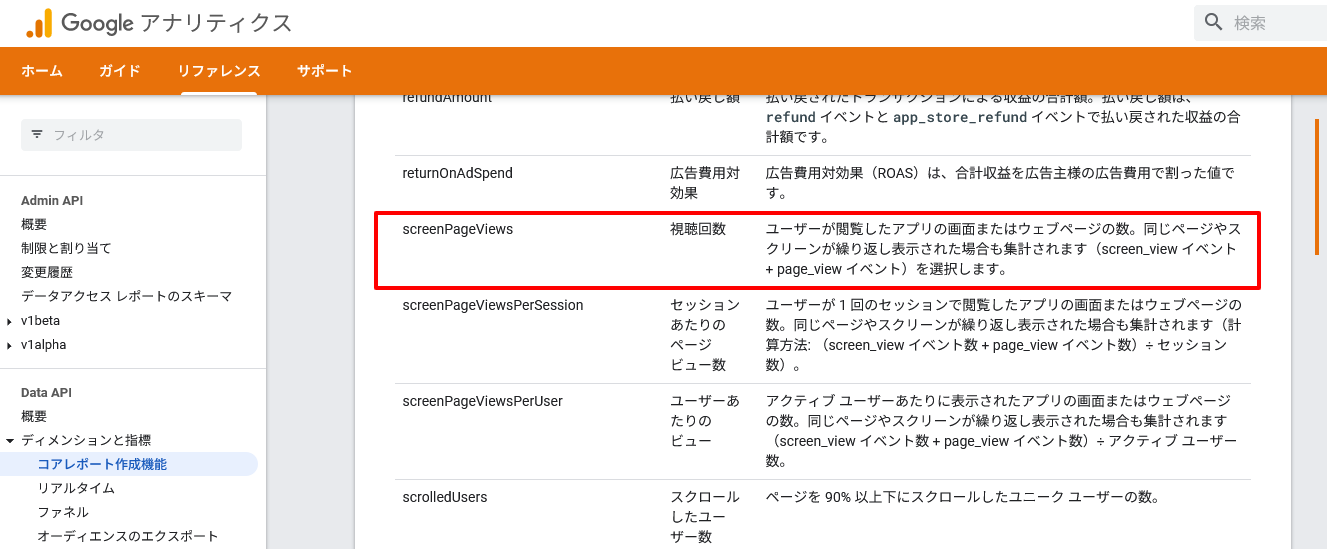
'metrics' => [ // ページビューの数が指標
new Metric(['name' => 'screenPageViews']),
],
'orderBys' => [ // ページビューが多い順から少ない順へ
new OrderBy([
'metric' => new MetricOrderBy([
'metric_name' => 'screenPageViews',
]),
'desc' => true,
]),
],
'limit' => 10, //最高10まで
]);
// 出力をブレードでフォーマット
$rows = [];
foreach ($response->getRows() as $row) {
$title = $row->getDimensionValues()[0]->getValue() ?? null;
$url = $row->getDimensionValues()[1]->getValue() ?? null;
$count = $row->getMetricValues()[0]->getValue() ?? null;
if ($url === '/') {
continue;
}
$rows[] = (object) [
'title' => Str::before($title, ' – ララジャパン'),
'url' => $url,
'views' => $count,
];
}
$html = view('ranking', compact('rows'))->render();
echo $html;
return Command::SUCCESS;
}
}
上のrunReport()に渡す配列のディメンションと指標は以下に説明があります。
https://developers.google.com/analytics/devguides/reporting/data/v1/api-schema?hl=ja#dimensions
上で使用したディメンションは、
指標は、
コマンドの実行
上のコマンドを実行すると、以下のような出力となります。これをコピペしてWordpressに入れ込みます。
$ php artisan ga4
<div class="mg-wid-title"><h6 class="wtitle">Trending</h6></div>
<ol>
    <li><a href="/2023/11/23/メルマガをワンクリックで登録解除/" class="trending">メルマガをワンクリックで登録解除</a></li>
    <li><a href="/2021/05/03/bulk-insertで大量のデータをdbに登録する/" class="trending">bulk insertで大量のデータをDBに登録する</a></li>
    <li><a href="/2020/02/08/phpunitの実行のあれこれ/" class="trending">phpunitの実行のあれこれ</a></li>
    <li><a href="/2022/08/22/sqlのcount関数と条件/" class="trending">SQLのCOUNT()関数と条件</a></li>
    <li><a href="/2020/10/03/withinput-witherrors-with/" class="trending">withInput(), withErrors(), with()</a></li>
    <li><a href="/2022/01/24/laravel-collection(9)foreachの代わりにeach/" class="trending">Laravel Collection(9)foreachの代わりにeach</a></li>
    <li><a href="/2016/06/19/eloquentでカウントするときの注意/" class="trending">Eloquentでカウントするときの注意</a></li>
    <li><a href="/2023/09/25/laravelの新しいmailableでhtmlメールを送信/" class="trending">Laravelの新しいMailableでHTMLメールを送信</a></li>
    <li><a href="/2020/07/25/abortを使ってリダイレクト/" class="trending">abort()を使ってリダイレクト</a></li>
</ol>
ちなみに、上のコマンドで使用されたブレードは、
<div class="mg-wid-title"><h6 class="wtitle">Trending</h6></div>
<ol>
@foreach ($rows as $row)
    <li><a href="{!! $row->url !!}" class="trending">{{ $row->title }}</a></li>
@endforeach
</ol>
メルマガ購読の申し込みはこちらから。